DIY Converting Sprinklers to High Efficiency Nozzles or Drip Irrigation
Replace Existing Sprinkler Nozzles with High Efficiency Nozzles
High-efficiency rotary nozzles apply water more slowly and uniformly to your landscape via rotating streams, encouraging healthy plant growth while also saving water and reducing runoff.
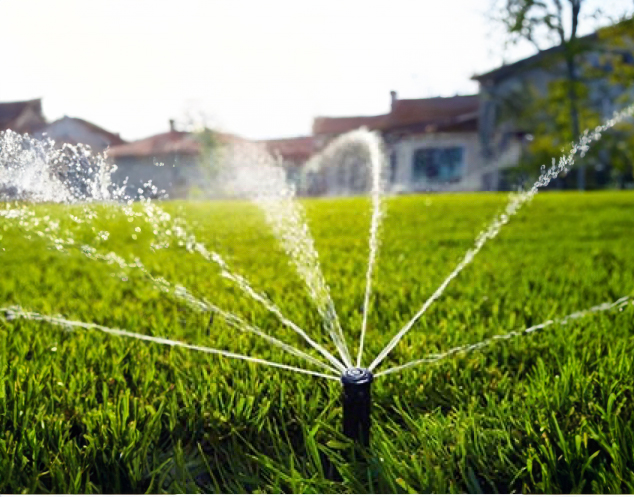 Rotary Sprinkler Nozzle
Count how many sprinkler heads are in your landscape, along with make and model.
Turn on your system to make sure you don’t miss any sprinklers. Place a flag/marker next to each sprinkler.
Mark down the arc or width of the spray pattern of each head. This will help you determine the number and type of nozzles you need.
Measure the distance between the sprinkler heads to determine what type of sprinkler body you need.
Rotary nozzles work best at 30-40 psi and require pressure regulating sprinkler bodies.
A qualified specialist can help you select the right parts for your system.
Use a shovel and hand spade to dig around the sprinkler head, avoiding damaging the pipe.
Unscrew the sprinkler head from the pipe.
Once every sprinkler head is removed, flush the line by turning on the system for a few seconds to clear out any dirt that may have entered the system.
Install the new sprinkler body to the pipe by, making them hand tight (do not over screw).
Once all new sprinkler bodies are assembled, flush the system for a few seconds once again.
Lift the stem out of the sprinkler body and unscrew the stock tip.
Place the new high-efficiency rotary nozzles into the stem and tighten.
Once all the new nozzles are installed in the bodies, turn on the system. Tune any nozzles that need adjustments to the arc or radius.
Arc: By hand or using an adjuster tool, twist the sprinkler riser and turn it to the desired position.
Radius: Use an adjuster tool or screwdriver to twist the top of the nozzle to the desired distance of throw.
Turn off the water and backfill the holes around the sprinkler heads.
Leave the tops of the sprinklers exposed at grade
Update your controller to adjust watering times to fit your new system.
Easy DIY Conversion from Existing Sprinkler System to Drip Irrigation Using Rain Bird 1800 Spray to Drip Retrofit Kit
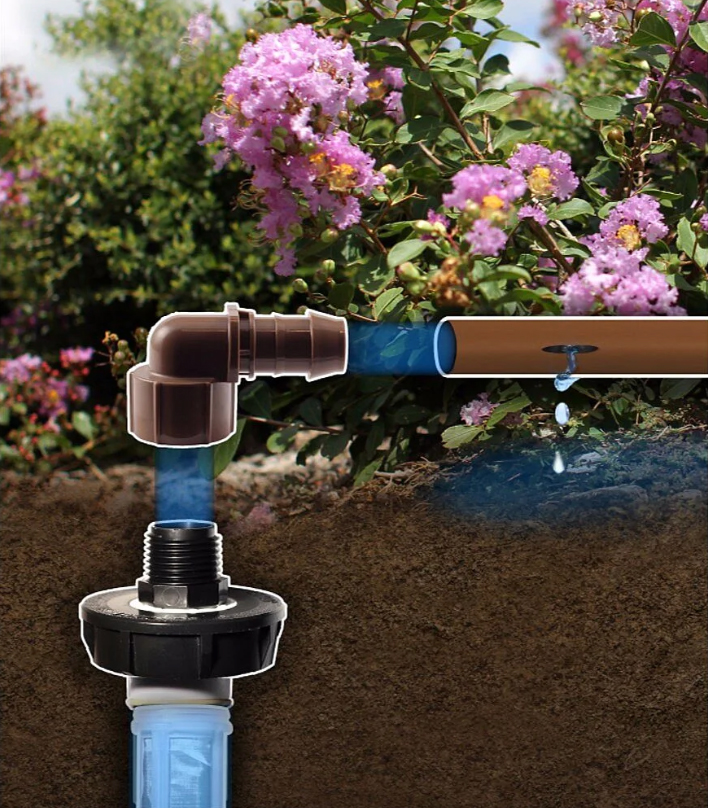 Rain Bird 1800 Retrofit Kit
Determine how many sprinkler heads you have in each zone (connected to one valve).
Turn on your system to make sure you don’t miss any sprinklers.
Zone should be dedicated to a single type of plant material (ground cover, shrubs, hedges and/or trees) or plants with the same water needs.
Remove all existing spray caps and replace them with the 1800 Retro Kit components.
The 1800 Retro Kit includes a 30-psi pressure regulator and 200-mesh filter.
Screw on the low-profile tee or elbow fitting to the ½” outlet.
Attach the ½ inch inline emitter drip tubing to the barb tee or elbow.
Lay the drip tubing out around the plants. You can utilize a snake pattern or a grid pattern for larger landscapes.
Snake pattern
When snaking it around plants, be sure to get emitters around 60% of the root ball of each plant.
Grid pattern
Disperses the water evenly across the bed.
Be sure the emitters between rows are offset in a triangular pattern.
You may need drip fitting elbows for this layout.
Avoid placing emitters directly at the plant’s stem- this may cause root rot and result in plant death.
Use no more than 300 feet of tubing per valve.
Use stainless steel u-hooks to stake down drip tubing every 3 feet to keep it in place.
Attach a coupling and flush cap to the end of the tubing.
Cap off all remaining spray heads.
For sprinkler brands that don’t fit with caps, remove the entire sprinkler, and install PVC caps at the riser underground.
Take the flush cap off the drip line and turn on the system to flush out any dirt that may have gotten into the system.
Run it for about 1 minute, then turn off.
Test the system by turning on the valve
Check to see that all emitters are working.
Check for any leaks in the tubing.
For leaky areas, cut out the tubing and replace with drip fittings and more tubing.
Schedule the irrigation controller.
Drip systems run longer than sprinkler systems, since water flows in gallons per hour instead of gallons per minute.
Visit the Watering Calculator for a recommended schedule.
Install a 2-4 inch layer of mulch to cover the drip tubing and help the soil retain water.
Replenish mulch annually or as needed.